Basic Skills
In this tutorial, we will go over all of the basic functionalities of SuperGradients very briefly. Go over the following sections to learn how to train, test and predict using SuperGradients. Check out our extended tutorials on the various features you can find in SuperGradients, and task-specific guides.
1. Train a Model
0. Imports:from super_gradients.common.object_names import Models
from super_gradients.training import Trainer, models
from super_gradients.training.metrics.classification_metrics import Accuracy, Top5
from super_gradients.training.dataloaders.dataloaders import cifar10_train, cifar10_val
from super_gradients.training.utils.distributed_training_utils import setup_device
init_trainer()
setup_device("cpu")
setup_device(num_gpus=4)
setup_device(num_gpus=-1)
trainer = Trainer(experiment_name="my_cifar_experiment", ckpt_root_dir="/path/to/checkpoints_directory/")
model = models.get(Models.RESNET18, num_classes=10)
training_params = {
    "max_epochs": 20,
    "initial_lr": 0.1,
    "loss": "CrossEntropyLoss",
    "train_metrics_list": [Accuracy(), Top5()],
    "valid_metrics_list": [Accuracy(), Top5()],
    "metric_to_watch": "Accuracy",
    "greater_metric_to_watch_is_better": True,
}
train_loader = cifar10_train()
valid_loader = cifar10_val()
trainer.train(model=model, training_params=training_params, train_loader=train_loader, valid_loader=valid_loader)
2. Test a Model
0. Imports:from super_gradients.common.object_names import Models
from super_gradients.training import Trainer, models
from super_gradients.training.metrics.classification_metrics import Accuracy, Top5
from super_gradients.training.dataloaders.dataloaders import cifar10_val
from super_gradients.training.utils.distributed_training_utils import setup_device
init_trainer()
setup_device("cpu")
setup_device(num_gpus=4)
setup_device(num_gpus=-1)
trainer = Trainer(experiment_name="test_my_cifar_experiment", ckpt_root_dir="/path/to/checkpoints_directory/")
model = models.get(Models.RESNET18, num_classes=10, checkpoint_path="/path/to/checkpoints_directory/my_cifar_experiment/ckpt_best.pth")
test_metrics = [Accuracy(), Top5()]
test_data_loader = cifar10_val()
test_results = trainer.test(model=model, test_loader=test_data_loader, test_metrics_list=test_metrics)
print(f"Test results: Accuracy: {test_results['Accuracy']}, Top5: {test_results['Top5']}")
3. Use Pre-trained Models
0. Imports:from super_gradients.common.object_names import Models
from super_gradients.training import models
from super_gradients.training.metrics.classification_metrics import Accuracy, Top5
from super_gradients.training.dataloaders.dataloaders import cifar10_train, cifar10_val
from super_gradients import Trainer, init_trainer
init_trainer()
setup_device("cpu")
setup_device(num_gpus=4)
setup_device(num_gpus=-1)
model = models.get(Models.RESNET18, num_classes=10, pretrained_weights="imagenet")
model = models.get(Models.RESNET18, num_classes=10, checkpoint_path="/path/to/imagenet_checkpoint.pth", checkpoint_num_classes=1000)
4. Predict
0. Imports:from PIL import Image
import numpy as np
import requests
from super_gradients.training import models
from super_gradients.common.object_names import Models
import torchvision.transforms as T
import torch
from super_gradients.training.utils.distributed_training_utils import setup_device
init_trainer()
setup_device("cpu")
# Load the best model that we trained
best_model = models.get(Models.RESNET18, num_classes=10, checkpoint_path="/path/to/checkpoints_directory/my_cifar_experiment/ckpt_best.pth")
best_model.eval()
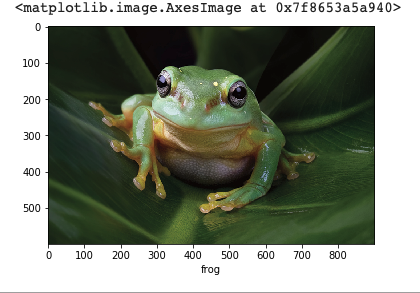
url = "https://www.aquariumofpacific.org/images/exhibits/Magnificent_Tree_Frog_900.jpg"
image = np.array(Image.open(requests.get(url, stream=True).raw))

transforms = T.Compose([
    T.ToTensor(),
    T.Normalize(mean=(0.4914, 0.4822, 0.4465), std=(0.2023, 0.1994, 0.2010)),
    T.Resize((32, 32))
])
input_tensor = transforms(image).unsqueeze(0).to(next(best_model.parameters()).device)
predictions = best_model(input_tensor)

classes = train_dataloader.dataset.classes
plt.xlabel(classes[torch.argmax(predictions)])
plt.imshow(image)
5. Train using SG's Training Recipes
0. Setup: - Clone the SG repo:git clone https://github.com/Deci-AI/super-gradients
pip install -e .
export PYTHONPATH=$PYTHONPATH:<YOUR-LOCAL-PATH>/super-gradients/
python -m super_gradients.train_from_recipe --config-name=cifar10_resnet experiment_name=my_resnet18_cifar10_experiment